
I used to use a “social bookmarking” site to manage my digital archives. I adored it! I would tell people that it changed my life and it did. However, *confession time* digital clutter can be overwhelming. It’s so easy to save digital resources because they have no physical impact, but just as with physical clutter, it can reach the point of being too much to be useful. I got to the point where I had over 2500 bookmarks in it and it stressed me out because things I needed were getting harder to find, even though they were tagged. Every summer I told myself that I would carve out some time to reorganize the tags to make those resources more usable, and I never did. Eventually, over time, I just stopped using it. I just didn’t log in. And you know what? I haven’t missed it and those 2500 bookmarks haven’t missed me either! In the past few years, there hasn’t been one time that I needed something and thought, “oh! that’s in my digital bookmarks!” It was a great tool for the time in my life when I needed it, but as my career path changed, so did my needs.

I tell you this story for a few reasons. First of all, it’s ok to simply abandon a digital resource that you don’t use anymore. There are entirely too many tools and resources available to force yourself to use one that doesn’t meet your needs, especially if your needs have changed. Find something that fits with your workflow and your preferences. Try out a few and don’t feel guilty if you start one and decide it doesn’t work for you.
Secondly, I wanted to share what I do now instead! Somewhere along the way, as my relationship with the social bookmarking site was on the way out, Jessica pointed out that Google had a “Save” feature (*cue the heavenly voices*). I’m not sure why I hadn’t heard of it before, but that’s beside the point. Since it was similar to what I used before, and since I use everything else Google, this made total sense for me!
If you have a Google account, you already have a Google Save account. You don’t have to do anything extra, just start using it! ![]() Start by installing the Chrome Extension for Google Save. It hangs out up there in my Chrome Extensions, cheerfully ready to serve by saving whatever I need it to!
Start by installing the Chrome Extension for Google Save. It hangs out up there in my Chrome Extensions, cheerfully ready to serve by saving whatever I need it to!
There are two major categories of things Google Save saves: images and webpages. The Chrome extensions works for saving webpages.
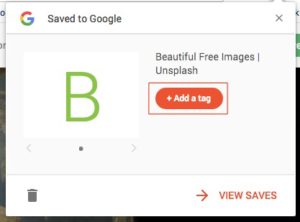
Once you’ve discovered a site you want to save, just click the star and you’ll see a popup window. Here, you can add tags to help keep your digital resources more organized.
WARNING! Give this some thought before you begin! In my other bookmarking tool, I used tons of tags. The more tags the better. Any topic I might possibly identify within this resource became a tag because I was never sure how I would need to find it again. This is the only thing I don’t like about Google Save: their search options at the moment aren’t stellar. The more tags you have, the more you have to visually scan through to find what you need. If I were you, I’d spend a little time planning your digital archives and thoughtfully choose one or two tags for each website I saved. I would use broad tags like subject areas, grade levels, units, etc. You’ll thank me later!
You can change the thumbnail image using the arrows below, add your tags and that’s all there is to it!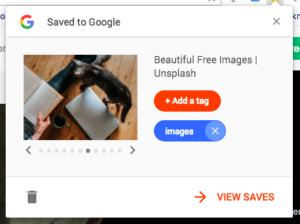
To view your saved links, click View Saves at the bottom of the window, or go to google.com/save.
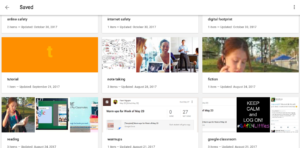
This is where it gets a little crazy, but it’s ok! The saved links are organized by date saved (most recent first), not alphabetically like I’d prefer. So it’s a bit of a challenge to find things if you have a lot of tags. This is why I say choose quality over quantity when it comes to tags. However, you can use the Ctrl + F to find what you’re looking for on the page if you know what tag you want. This is what mine looks like:
The other thing you can do is save images from any Google Image Search. Click the image, then click the Save button in the options on the left. It creates a “folder” of saved images in your Google Save automatically! You can also visit your Google Save page by clicking View Saved, and scroll all the way to the bottom.

I see this as a great addition to my Google toolbelt. It’s another tool that is available to me whenever I log into my Google account, regardless of what computer I’m using. It’s simple enough that I would use it with students as a way to organize research and start learning how to manage their own digital resources.
Have you used Save?




Leave a Reply