 It would seem that we’re a little bit late to the Flipgrid party, but I’m SO glad we have finally arrived! This versatile tool has earned a place in our core list of universal apps because it really has “endless uses” (as the website claims). Also, it’s easy to use, requires minimal prep, and no student logins!

Here’s how I caught #flipgridfever…While I was working on integrating technology into Jessica’s post last week about an amazing historical picture book, I needed something that would let me capture students’ thoughts and voices around a primary source. I started a few times in some of our other go-to apps, but nothing was quite right. A recent conversation with a technology specialist who was raving out Flipgrid came to mind, so I decided to try it since I needed a brain break anyway.
My brain didn’t get much of a break though because I got completely sucked in! Within 5 minutes I had my first grid up and running and my first topic posted. I signed up for a free Flipgrid One account (more on that in the note at the end of the post). With the primary source document as my image, I was able to also include an essential question for students to respond to. I loved the versatility of the teacher dashboard (especially the moderation option!), and I really appreciated the flexibility of the space.

Step 1: Creating a Grid. Flipgrid says to think of this grid like a classroom. After you create the classroom, you can add topics for discussion. There are four sections to set up – pay particular attention to the security and privacy settings in Section 2 where you have the ability to password protect your grid and control the ability to share the grid on social media (including Google Classroom). I also like Section 3 where I can get notifications of new posts being made to my grid. Add a cover image and you’re good to go!

Step 2: Add Topics. Each grid comes with an Ideas topic, where users can leave a quick 15-second video. Eventually, this space could become more of a free forum for sharing thoughts that aren’t necessarily connected to any of the other topics but related to the grid. However, at first, this is an ideal place for students to introduce themselves to each other and practice using the tool. The first few times they log in, have each student respond to an icebreaker question or prompt of some kind within this topic as you help troubleshoot as students are learning Flipgrid.
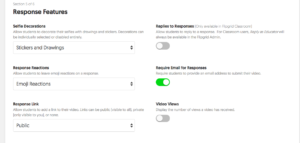
For each new topic you add, you have 6 sections of settings! I love the level of control and flexibility this gives you as an educator. I will call your attention to the response moderation option (in Section 1) and all the response features in Section 5.In this section, you can really determine how you want your students to interact and give them some creative freedom with stickers to use in their own videos and emojis to use for responding to others’ videos. Another feature I really like here is the ability to turn off the number of views for each video – this keeps it from becoming a popularity contest where students are comparing stats!

In Sections 3 and 4, you can upload a resource that will be the cover image of your topic. This is also your prompt – you can record yourself giving a prompt or upload a video or image. Any image uploaded (depending on the image size) can be viewed in higher resolution. You can also include links to supplemental materials in Section 4 if students need to do some research or exploration before they respond.

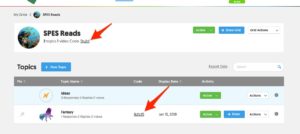
Your grid has a teacher dashboard and a student view. Clicking on the codes will take you to the student, or public, view. The link with that code is what you will share to have others visit and respond on your Flipgrid. You can share the whole grid, or you can direct people to specific topics!
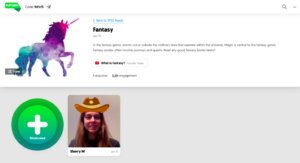
Step 3: Share the link. Post the link in your Google Classroom, as a link on your website or in your student management system, or even on the wall in the form of a QR code so students can visit the grid and start responding. They’ll record their video, then snap a selfie and have the chance to decorate it (if you’ve given them permission to do so), and finally, they’ll upload the video to add it to the Topic. On the last screen, students will enter their information. You don’t have to require a student email address, unless you want to (or you use Google Apps or something within your district), but it also gives them the opportunity to add a title and or links to the video. I would encourage your students to do this! Have them include hashtags too – these are searchable and can help students think about the main idea of what they’re saying.
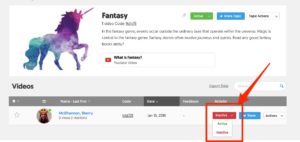
If you chose the moderation option, you simply have to visit your teacher dashboard and switch the inactive videos to active in order to display them on the Topic.
Integration Ideas
Flipgrid says, “Think of a Grid as your course and a Topic as discussion around a particular subject or theme.”
I LOVE this idea. You could apply this to any length of time – maybe you’re doing a unit on space, and so you have topics related space that you want the students to respond to show you what they know. Maybe you’re doing a round of literature circles around a particular theme (heroism, for example), and you pose different guiding questions in each topic that students can respond to regardless of the book they are reading, resulting in rich thematic conversations! Maybe you keep one grid going all year for your class and keep adding topics based on the things you study to result in a cumulative representation of learning at the end of the year. You might use it as a portfolio where each topic represents a specific checkpoint in the year and students respond in order to show growth since the last checkpoint.
Do you have ideas or success stories to share?? Please do!
Visit our Flipgrid to share your ideas with the Literary Fusions community! https://flipgrid.com/wvlkts
We’ll be sharing some more ideas over the coming months, particularly about how to use Flipgrid in the library!
Note: Some of the features are only available within Flipgrid Classroom. At $65/year, this upgrade is on the affordable side for educators, and offers a lot of appealing features like the ability to vary the video response time anywhere from 15 seconds to 5 minutes, customized feedback options, and allowing students to reply to response and create more of a conversation. The biggest difference between Flipgrid One and Flipgrid Classroom is the number of grids you can have. With Flipgrid One, you get one grid. You can delete it and make another one, but you are limited to one at a time. I haven’t used Flipgrid enough to decide if I want to upgrade yet, but from what I’ve seen so far, it’s looking like this tool might be one that I actually pay for in the future. They do offer a free 30 day trial of Flipgrid Classroom, which I will be using soon!


Leave a Reply