 I know, I know…another Google tool! It seems every time I turn around, Google has something new and incredible to make our lives better! Google Keep is one of my personal favorites. It is in the top five tools I use every day (right up there with my email and my calendar) and I’m convinced it’s short for Google Keep Me Sane. This little gem is so versatile with so many different options to fit any kind of organization style that I feel like I have my own personal assistant.
If you’ve ever jotted something down on a scrap of paper that you wanted to remember or come back to, and then lost that scrap of paper, Google Keep is for you. If your work space is littered with sticky notes piled so high that the one you need is probably covered up with three or four others, Google Keep is for you. If being organized makes you happy and office supply stores are your happy place, Google Keep is for you. I think of it like an endless supply of souped-up sticky notes in eight different colors! Let’s dive in, shall we?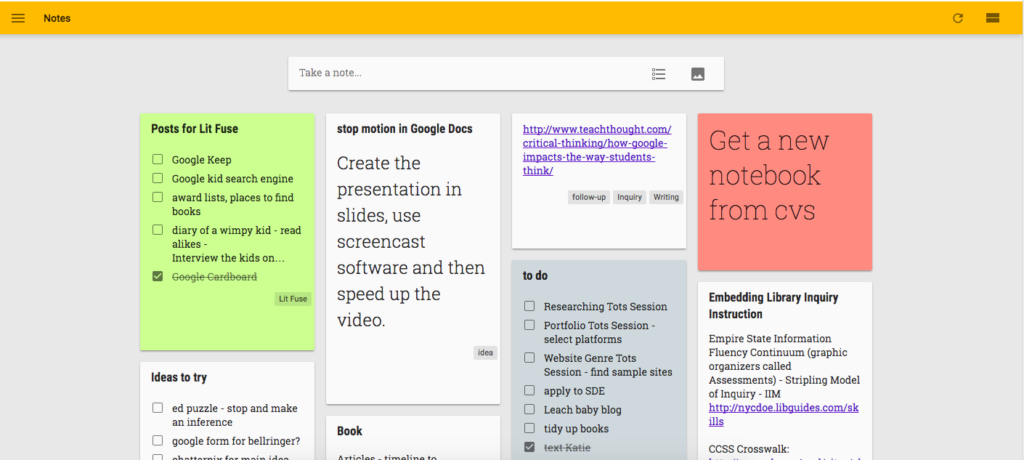
Like other tools in the Google suite, Google Keep works with your Google account and your information is stored in the cloud so you can add a note and access notes in real time from any device on which the app (iOS, Chrome, or Android) is installed or with which you can access the website (http://keep.google.com). Google Keep also lets you share and collaborate on notes with specific people, like you can with other Google files (more on that later!).
At the top of the page, click “Take a note…” and the note box will expand. The title will show up bold on the note, but you can choose to skip the title if you want. You could start a list (which we’ll get to in a minute) or you could even include a picture. On the mobile app, there is an additional microphone option, where you could dictate your note.
Let’s check out the features of these high-tech sticky notes!
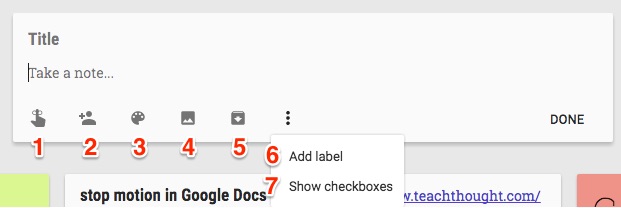
 Remind Me. Set a reminder based on day, time or location (if you’re using a mobile device). When that time comes, it will pop up with a reminder on your screen, with the content of the note.
- Add a Person. I LOVE this feature (even though it’s a new thing). I love being able to collaborate on notes or to-do lists. I even have a note shared with my husband that is our grocery list! I just add what we need, it shows up on his phone, and he can get it from the store for me! I also have tons of notes shared with Jessica so we can see who is going to do what on a project and what we have left to do before a conference or session. This would be golden for students working on a group project to be able to outline steps, assign responsibilities, and stay on top of the project.
- Color!!! Choose from eight different colors for the background of your note. I see this being really effective for students using Google Keep to stay organized. They can keep track of homework or notes from different classes by assigning each class it’s own color. Then, at a glance, they can see what needs to be done in which class.
- Add a picture. On your computer, this takes you out to browse your files to add an image. On your phone, it takes you to your camera roll so you can add any image you have saved. I’ve done this when I’m browsing at the library or bookstore and find a new book that I want to read – I just snap a picture and add it to a note in Google Keep.
- Archive. This will archive the note when you are done with it, but not delete it. You could then go back to the archive to reference old notes, if you needed to.
- Add Label. I LOVE this one too. Just like labels in your Gmail inbox, you can tag your notes too. You come up with the categories (maybe different subject areas, projects you’re working on, areas of your life like school, personal, kids, etc.) and you an add multiple labels to a note. Then, you can click on that label, and it will show you just the notes in that category. LOVE!
- Show Checkboxes. I probably use this feature the most often. I’m a list girl. Lists keep me organized and help me feel like I’m in control (I have issues). I also love to check things off the list. This feature gives you a neat little checkbox next to each item, and when you click it, it draws a line through the item and moves it to the bottom of the list. This is so great, because then I can see what I’ve already done!
Of course, you can come back and apply any of these features or edit the note at a later time. However, there are a few additional options for notes that have already been created.
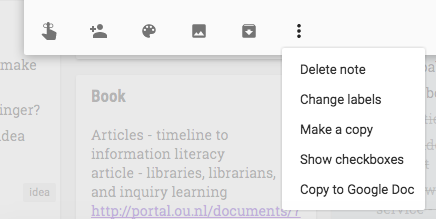
Integration Idea: The one option to which I particularly want to draw your attention is “Copy to Google Doc.” Use Google Keep (open on your device with a physical text or in a window side by side to a text you are reading) to take notes. Color code or label the notes for virtual note cards!
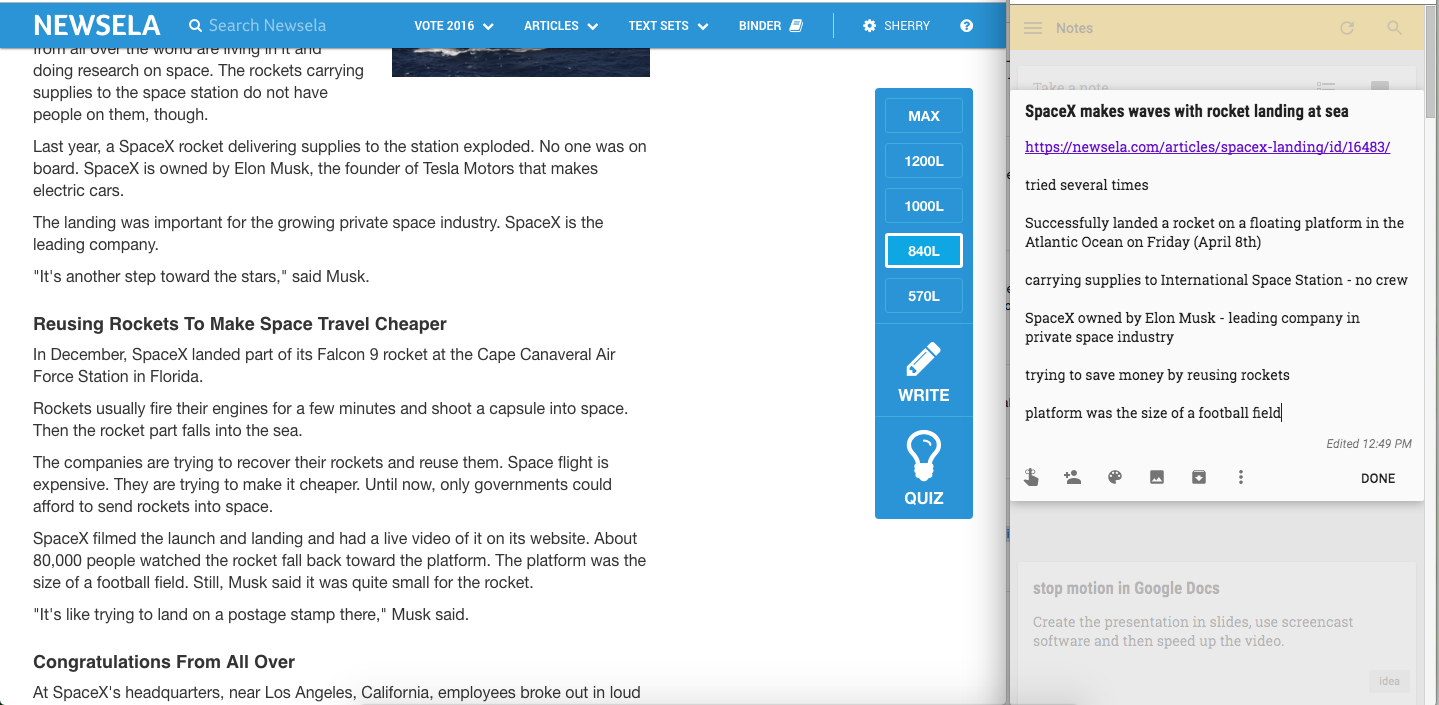
Then you can convert the note into a Google Doc as the beginnings of a research paper or bibliography.
Bonus: Make sure to copy the link to the site you’re using for research into your note, and once you’ve converted to a Google Doc, use the Easy Bib Bibliography Creator Add-On to cite your source!



Cool!
Love all the info!
Love the idea of Google keep…definetely going to try it.
This workshop is so meaningful!!! I truly have a clear understanding now. Thanks for sharing your awesome work!
I’m so glad you enjoyed the training Angela! Have a great school year.