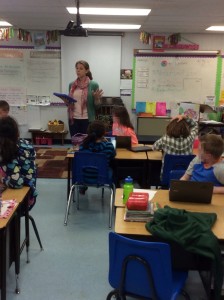
 I recently had the opportunity to use Nearpod with a group of fourth grade students, and as I was thinking about it, I couldn’t believe I haven’t written about this fantastic app yet! Nearpod is one of the “oldies but goodies” that has been around a while, but that you kind of forget about until you see it at a conference or in a blog post like this. Then you go, “Oh, right! I remember that app. It’s so cool! I should use that again!”
 If I had to sum it up, I would probably describe Nearpod as an interactive presentation tool. However, that just doesn’t seem to do it justice! Sometimes you do have to directly share information with students through a presentation, but this lets them interact with it at the same time! I was privileged to be able to earn my certification in this fine tool over the summer, and I hope you will love it as much as I do!
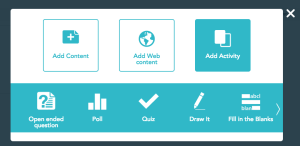
To use Nearpod, students need their own devices, but it that doesn’t mean it will only work for 1:1 schools or classrooms. Since Nearpod is web-based, it can use laptops, Chromebooks, iPads, Android tablets, smartphones, desktops or a combination of all of the above. The students do not need a login or an account to access the presentation, and once they have joined, the teacher controls the pacing of the presentation and the interactivity. Interactivity includes free response questions, poll questions, and fill-in-the-blank questions, the answers to which appear on the screen of the teacher in real time as they are submitted. Formative assessment at its finest! The teacher can then choose to share specific answers (anonymously, of course) to the students’ screens for discussion. So cool! Other interactivity options are sending the students a picture on which they can draw or annotate and submit, and embedding a website or video that students can explore or watch on their own devices in their own time. If it looks like the students are getting distracted on the website, the teacher can advance to the next slide, and so do all the student screens. Oh, and did I mention this is free??
To get started, visit Nearpod.com (also check out the the Nearpod app for iOS and Google Play) and sign up for a free account (referral codeK2AYT4 – if you feel like helping me out!). As a Silver member, you can use most of the basic features for free, and I’ve always been quite happy with those features. If you get a few of your friends to sign up, you can have a free trial of the Gold membership for 6 months!
This is your teacher dashboard. More on each of the pieces later on, but here it is in a nutshell:
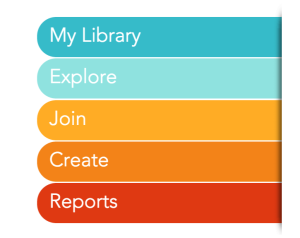 My Library houses all the presentations you either create or download (you can also create a new presentation from this option).
Explore lets you look through Nearpods created and shared by other teachers (some paid, some free).
Join provides a box for you to enter a pin to join a live presentation and participate as a student.
Create gives you a blank presentation so you can get started making your own!
Reports shows you all the sessions you’ve run and keeps a record of your students’ answers during each one.
Creating A Presentation
Start by clicking on Create and making your first presentation! Click on Add Slide in the left corner, or if you have an existing presentation or images you want to use as slides, you can drag those into the window and it will upload.
Note: You can create slides in Nearpod, but if you are used to other presentation softwares, you might not like the scope of options available for things like color, etc. My recommendation is to make the slides you want to use in the presentation software of your choice, and export the slides as .jpg images, and upload those images to use as slides in Nearpod. The only downside is that if you want to make any changes, you’d have to redo the slide in your software, redownload it, and reupload that slide.
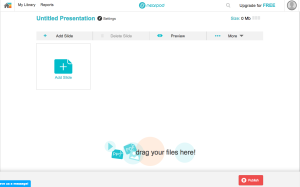
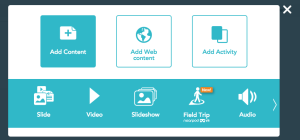
You then choose the type of slide you want to add. Not pictured is the Web Content option, which just lets you paste in a web address.
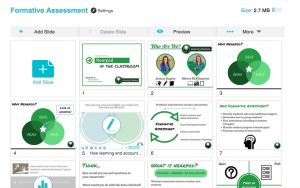
Once you get a few things added, it will look like this! You can drag and drop to rearrange, and you can identify the activity slides by the little icon that corresponds to that activity. To preview any slide, just click it to make it bigger. You can always get back to this screen to make changes. If you’re done with your presentation, click the Publish button in the bottom left corner and it will go live, ready for you to invite students to join!
My Library
You’ll likely spend most of your time in My Library, creating or editing presentations, or starting sessions for your students. You’ll see the thumbnail for all the presentations you “own” in this library, either that you created or downloaded from the Explore section.
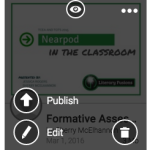
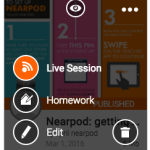
Mouse over the thumbnail to see the options. Each presentation must first be published before you can start a live session! You can also edit from here and delete presentations as well. The three dots in the corner offer additional options such as sharing and duplicating.
Participating as a Student
All students have to do is go to Nearpod.com, or open the app, and enter the pin that is generated. The pin is different for every new session, and will remain at the top of the screen while you run the presentation in case students get kicked offline or have computer issues and need to rejoin while the session is in progress.
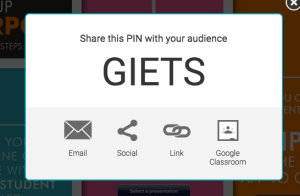
Then, the students will enter their name, and be taken to the first slide of your presentation.
As you advance the slides on your screen, they will see the same slide – you have the control over the presentation! When they see an activity/question screen, you see their answers coming in.
Reports
Once you’ve run a session, you can always come back to the students’ responses by clicking on Reports.
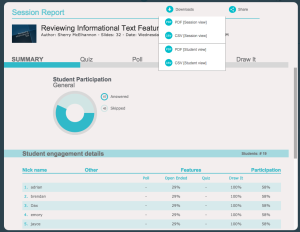
The reports break it down by question, but also give you a nice summary so you can see how students participated overall. (For this presentation, I had some open-ended questions we skipped due to time – that’s why the participation seems a bit low!) You can then download the report, which includes each student’s responses, in a .pdf or .csv (spreadsheet) format.
Student Participation and Classroom Management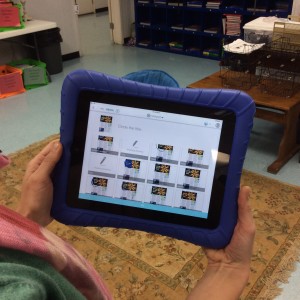
I LOVE how this tool lets the teacher be actively involved in monitoring their class, both electronically as you see the responses coming in, and physically as you are not tied to any particular area in the room. When I used this with my fourth graders, I ran the presentation from my iPad and was able to walk all over the room while I did, stopping by a few particular students that are known to be a bit easily distracted. I was also able to see responses from those students that don’t typically speak up in class, so I had a good idea of where every student was with the concept I was reviewing.
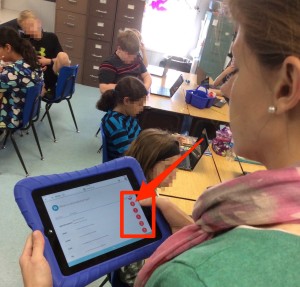
The students LOVED when I shared their responses as an example of a correct answer, or as a discussion prompt. See the little red “share” button? That lets you share the student’s response anonymously to the rest of the class. However, the students were so proud that their answers were chosen that they gladly owned them out loud to the class! I honestly think they worked harder after they realized that I was going to pick an answer to share!



I love to use NearPod. Students like to use technology and this a tool to incorporate interaction and assessments while keeping them engaged with a device.